30 October 2015

3.05 Brioche & Butterscotch Pudding - Intermediate - Baking & Desserts


I was in a bit of a decadent mood one day, and having recently seen an episode of Nigella Express where she made a Caramel Croissant Pudding (a riff on Bread & Butter Pudding), I decided that something similar would satisfy the urge. A couple of hours later, I was tucking into this quite contentedly.

While "butterscotch" typically refers to a mixture of butter and brown sugar, I decided to take it a bit more literally by adding quite a large amount of scotch whisky (apparently anything labelled "whiskey" is not authentic scotch). There is a fair bit of fire involved in burning off the alcohol, and even then it doesn't all evaporate, so I would recommend that you do not use a non-stick saucepan to make the custard base.

Due to the booze content that lingers even after baking, I will leave it up to you to decide whether it is acceptable to give to your children or not.

Ingredients:
1 loaf Brioche, cut into cubes
200ml scotch whisky
500ml milk
75g unsalted butter
2/3 cup caster sugar
1 cup dark chocolate buttons
2 whole eggs
4 egg yolks
1 tsp vanilla extract/essence/paste
Pinch of salt

In regards to the Brioche, the cubes should be approx. 2.5 cm, (or 1 inch). If possible, it should also be slightly stale (as in a couple of days after it was baked) as the more it dries out, the more custard it will absorb. Most loaves are around 450-550g (approx. 1lb).

If you don't want to use scotch, you can use Irish whiskey, bourbon, rum, etc. I've also made it with Baileys and another time with Frangelico, but this will change the flavour a bit. If you want to leave the alcohol out altogether (spoilsport) just use some extra milk.

As mentioned above, "butterscotch" is meant to be butter and brown sugar, however I have opted to use caster sugar (which is sweeter) to smooth the edge off the alcohol. If you're leaving out the alcohol, feel free to use 2/3 cup of brown sugar instead. If you can find raw caster sugar, this is a good compromise as it has all the sweetness of plain caster sugar with a hint of caramel reminiscent of brown sugar.

Method:

1. Preheat oven to 180°C (350°F).

2. Tumble half of the cubed brioche into a baking dish, then scatter over half of the chocolate buttons.

3. Repeat Step 2 with the remaining brioche and chocolate.


4. Melt the butter in a saucepan over medium heat, then stir in the sugar until combined and it begins to change colour and crystalise. (You'll be adding liquid which will dissolve any lumps.)

5. Pour in the whisky. (TIP: You may want to do this off the heat as it can catch fire right away if you're using a gas stove.)

6. Either set it alight (carefully) and swirl the pan until the flames stop, or allow to simmer for at least 5 minutes, stirring frequently. (Fire can tend to scorch the pan, hence the reason not to use non-stick.)


7. Once the alcohol is burnt off, stir in the milk until combined, then remove from the heat.

8. In a jug, whisk together the eggs (including the extra yolks), vanilla and a pinch of salt until combined, then whisk in the hot milk and whisky mixture until combined.

9. Slowly pour the custard mix over the brioche and chocolate, ensuring that it is as evenly distributed as possible, then press down the brioche so that it submerges in the custard as much as it can.


10. Allow to rest for 5-10 minutes. (This allows the brioche to absorb the custard.)

11. Place into the oven and bake for 35-45 minutes or until the custard is set and the top is golden brown.

12. Allow to cool for at least 15 minutes before serving with some whipped cream or ice cream.

Serves 2-8 (being realistic!).

A video of this recipe is also available - https://youtu.be/DFyhHJWC0HA.

25 October 2015

3.04 Tips #4 – Using Packaged Products


I hope you’re enjoying the recipes so far, but it’s time for the first of this season’s Tips.

There’s a bit of a stigma surrounding the use of packaged products in cooking. I personally think it’s undeserved, as they can be a handy shortcut, or even an essential ingredient! I’ll explain my take on things, plus there’s a BONUS Spaghetti alla Puttanesca recipe just in time for World Pasta Day!

If you feel that you can sit this one out, I will be back with another recipe next week. For everyone else, please watch the video at https://youtu.be/MPOW8uhYGPg.

If anyone would like to share their own tips, or even if you just have a question, please do not hesitate to email me.

16 October 2015

3.03 Chimichurri Beef Fillet w/ Sweet Potato & Zucchini – Intermediate – Meat & Poultry


Sometimes there’s nothing better than a bit of grilled steak with some vegetables. Other times, you may want something similar, but a little more interesting, and that is precisely where this recipe came from.

In a completely unintentional turn of events, this recipe is also Paleo Diet friendly, but don’t let that discourage you!

Ingredients:
1kg beef eye fillet
½ cup parsley, roughly chopped
½ cup coriander, roughly chopped
250ml extra virgin olive oil
¼ Spanish onion
2 tbsp lime juice
2 cloves garlic
500g sweet potato, diced
2 zucchini, julienned
1 tbsp lemon juice
Salt and pepper

I suppose you could really use your favourite cut of steak for this recipe instead of using a piece of eye fillet (which can be quite expensive sometimes), but if this is on the menu for a dinner party, then the fillet is much more impressive.

I am aware that traditional chimichurri sauce is made using vinegar, but I prefer to use lime juice as it has a fresher zing. Cooking is all just a matter of taste, right?

Method:

1. Slice the fillet in half. (This will make it easier to fit into the pan, as well as give you more surface area for the marinade.)

2. Place the parsley, coriander, onion, garlic and lime juice into a food processor, along with 125ml of extra virgin olive oil and a generous pinch of salt, and blend until finely chopped. (TIP: If you transfer the chimichurri sauce into a squeeze bottle it will make it easier to decorate the final dish.)


3. Brush approx. 1/3 of the chimichurri sauce over the beef fillet until it is coated evenly, then place aside to marinate for at least 25 minutes. (This will also allow time to bring the beef up to room temperature, which is ideal for cooking.)

4. Sear the fillet in a grill pan over high heat for approx. 2 minutes on each side, then place into a preheated 180°C (350°F) oven until cooked as desired. (Cooking time depends on the width of your fillet, but basic cooking times are 10 minutes for rare, 15 minutes for medium-rare, 20 minutes for medium, 25 minutes for medium-well done, and 30 minutes for well done. I would recommend that you do not cook an eye fillet beyond medium if possible.)


5. While the fillet is roasting, place the sweet potato into a pot with some lightly salted water and boil for approx. 15 minutes or until soft.

6. Drain the sweet potato and transfer to a food processor along with approx. 100ml of extra virgin olive oil and a generous pinch of salt and process until smooth. (TIP: If the puree is too thick, add a bit of boiling water or extra oil until the desired consistency is reached.)


7. Once the fillet is cooked, remove it from the pan, wrap with foil, and place aside to rest for approx. 10 minutes.

8. While the fillet is resting, return the pan to the stove on a medium-high heat and add the zucchini, remaining olive oil, and a pinch of salt and pepper, and fry until softened. Then add the lemon juice and continue to fry for a further 30-60 seconds.


9. To serve, place a large spoonful of sweet potato puree into the centre of the plate, then add a few slices of the fillet, and top with some zucchini. Finally, drizzle some of the leftover chimichurri sauce over the beef and around the plate.

Serves 4-6.

A video of this recipe is also available - https://youtu.be/c9frkM82kxY.

9 October 2015

3.02 Cinnaminis – Low-Fuss – Baking & Desserts


In all honesty, these are my lazy version of Cinnamon Rolls. I just gave them a catchy name.

These were my first baking 'triumph' and gave me the confidence to move onto things like profiteroles and macarons. I'll still make these from time to time due to popular demand (not that I really need an excuse!).

Ingredients:
Ready rolled puff pastry sheets, thawed and with plastic backing still attached
Chopped walnuts
Chocolate chips
Honey
Ground cinnamon
1/4 cup water
1 1/2 cups icing mixture
1 large egg

As you can see, most of these ingredients do not have a quantity. This recipe doesn’t really care about quantities, make as many or as few as you like, using as much of each filling as you like.

If you can get all-butter puff pastry, use it. But otherwise, just regular puff pastry is fine. Try to get the ready-rolled sheets to minimise any effort.

If you don’t like walnuts, then use peanuts, hazelnuts, whatever. Pistachio nuts may be nice, as people already tell me that these taste similar to baklava. You can leave the nuts out altogether if you must.

The same goes for chocolate chips. You can use dark, milk, or white. I try to find caramel flavoured white chocolate chips when I make these, and I’ve seen peanut butter or cinnamon chips around too. Maybe you could use cocoa nibs instead of both nuts and chocolate? There’s a lot of flexibility here.

I use honey in a squeeze bottle, just because it’s easier to control the amount in the recipe.

As mentioned in previous recipes, ‘icing mixture’ is icing sugar with some extra stuff added to help it thicken (usually cornflour/cornstarch). You could use plain icing sugar and just add a bit of cornflour.

Method:

1. Preheat oven to 180°C (350°F), line a tray with baking paper and place aside until needed.

2. In a small bowl, whisk the egg with a pinch of ground cinnamon until combined. Place aside until needed.

3. Place a sheet of puff pastry onto your bench plastic-side down.


4. Drizzle approx. 1 tbsp of honey over the pastry sheet in a narrow zigzag pattern, leaving a strip of approx. 2.5cm (1 inch) at the bottom of the sheet. (The zigzag pattern allows for maximum distribution across the sheet. The strip is where the roll will be sealed before being sliced.)


5. Scatter a small handful of walnuts over the pastry sheet, ensuring that you leave the strip at the bottom edge clear.


6. Repeat Step 4 with the chocolate chips.


7. Sprinkle some ground cinnamon over the top. (How much or how little is up to you.)


8. Brush the bottom edge with the cinnamon and egg mixture.

9. Peel the top edge away from the plastic and roll down to the bottom, pressing firmly enough to seal. (You should now have a log shape.)


10. Brush the log with more of the cinnamon and egg mixture, then slice into 12 discs.

11. Place the discs flat onto the tray and bake for 15-20 minutes, or until crispy, golden, and puffed.


12. Place onto a rack and allow to cool.

13. Repeat Steps 3-12 as many times as you like. (Or until you run out of ingredients.)

14. In a bowl, mix together the icing mixture and approx. 1/2 tsp ground cinnamon with the water to make it into a glaze.

15. Dip the top of each scroll into the cinnamon glaze, and return to the rack.


16. Place into the fridge until the glaze has hardened.

17. Eat them. (Maybe share a few.)

Each sheet of pastry makes 12.

A video of this recipe is also available - https://youtu.be/HCxoayGrTEI.

2 October 2015

3.01 Twice-Cooked Mandarin Pork Belly – Advanced – Meat & Poultry


I was having an Asian-inspired dinner party and wanted to do something that seemed semi-traditional and put my own spin on it. I tried at least 3 different versions of this dish before I think I finally got it right.

While this is Asian-inspired, the “mandarin” component refers to the fruit, not the language. The pork belly is first poached gently for 2 hours, before being glazed and roasted, much like a ham.

PART A – MANDARIN GLAZE


Ingredients:
2x 310g tins of mandarin segments (in juice or syrup)
1 long red chilli, sliced in half lengthways (with seeds)
3-4cm piece of ginger, cut into discs
200g honey
200ml rice wine vinegar

For the record, I tried this with fresh mandarin and it didn’t turn out too well. Don’t be afraid to reach for tinned foods occasionally! Sometimes it's the only way to get the result you want.

Method:

1. Place all ingredients in a pot over high heat and bring to the boil.

2. Reduce heat to low and simmer for 1-2 hours or until thick.

3. Remove it from the heat and allow to cool, then transfer to a bowl using a sieve, cover, and place into refrigerator until needed.

PART B – TWICE-COOKED PORK BELLY


PHASE 1 – POACHING


Ingredients:
1kg pork belly
1 cup chinese cooking wine
1 cup soy sauce
2 mandarins, peeled and crushed
2 spring onions
3cm ginger, cut into discs
2 large garlic cloves, crushed
1 long red chilli, sliced in half lengthways (with seeds)
approx. 2 litres cool water

If you want it to look nice and neat at the end, try to get a square piece of pork belly. You may need to cut it in half if that makes it easier fit into the pot for poaching.

The actual amount of water you'll need depends on the size of the pot you are using, as well as the size of the pork belly itself. You'll need enough to cover the pork belly to ensure that it poaches evenly

Method:

1. Place the pork belly into a large pot, then pour over the rice wine and soy sauce.

2. Add the mandarins, ginger, garlic, chilli and spring onions, then top up with water until the pork belly is covered. (It will want to float, but I’m sure you can judge when you have enough water.)


3. Place the pot onto a high heat and bring to the boil.

4. Reduce heat to low, cover the pot and allow the pork belly to poach for 2 hours. (Turn it down REALLY low, so that it’s only just simmering.)

5. Remove the pork belly from the pot and allow to cool slightly before removing most of the excess fat from the top. (You want to retain a bit which will melt in the oven.)


6. Place aside until you are ready to roast it. (Can be kept in the fridge overnight, but you'll need to bring it up to room tempersture before continuing to Phase 2. You may want to strain the poaching broth and keep it in the freezer for another time.)

PHASE 2 – ROASTING


Ingredients:
1 tbsp chinese five spice powder
1 tsp garlic powder
1 tsp ground ginger
1 tsp salt

These ingredients are to add an extra layer of flavour to the pork in the form of a dry rub. If you don’t want to do this, then I suppose it isn’t really necessary.

Method:

1. Preheat oven to 180°C (350°F) and line a baking tray with baking paper or foil. (This stops the glaze from baking onto the dish, which can be difficult to clean off.)

2. Mix together the spice powder, garlic powder, ground ginger and salt.

3. Rub the mixture over the pork belly until coated evenly. (You will likely have quite a lot of the spice powder left over, but you can store it in an airtight container and use it however you like.)


4. Brush the pork belly with the mandarin glaze until generously coated. (Once again, you may not use it all here.)

5. Roast the glazed pork belly in the oven for 15-20 minutes or until browned. (Keep an eye on it, the honey can make it burn very quickly.)


6. Dice into cubes approx. 4cm (1 ½ inch) and serve with jasmine rice and something green. (I would recommend steaming some Asian vegetables such as bok choy, choy sum, pak choy, etc.)

Serves 4-6 depending on the size of the pork belly you bought and/or your generosity in serving it.

A video of this recipe is also available - https://youtu.be/jX4KYurle9o.


29 September 2015


Welcome back to FoodPoint! Season 3 kicks off officially on 2nd October 2015. Once again, I have made some changes.

Firstly, the Tips videos are back (and hopefully better than ever)! The Tips in Season 1 were really just to ensure that you had a fairly decent kitchen kit, but by now that shouldn’t be an issue, so these Tips should actually provide some helpful information about other aspects of cooking.

Secondly, looking ahead to Season 4, I’d like it to be more interactive. Throughout Season 3 I’ll welcome any of your queries, requests and feedback. Is there a recipe that you want to see? Drop me a line or two and you might just see it in Season 4! Is there a certain technique that you’re having trouble with? I’ll work at it until I’ve mastered it and put it up as a Tip/Spotlight video!

As my viewers/readers, it’s your opinion that matters the most to me in this, and I’m genuinely interested in hearing from you. Don’t be shy!

Thanks to everyone for continuing to watch/read my humble little blog. Onwards and upwards!

--- Blake

P.S.: Check out the Season 3 Trailer at .

11 September 2015


SEASON 2 VIDEO BONUS RECIPES


If you don’t frequent the FoodPoint YouTube channel every week, then there is a chance that you may have missed out on the below recipes, which were included as part of the Season 2 ‘Spotlight’ videos. If you’re interested, please click the links to be taken to the videos.

Chile con Carne – Intermediate – from ‘Spotlight #1: Chilli’


This video recipe is available at - https://youtu.be/8rkZKcYDEsY.

Pavlova – Intermediate – from ‘Spotlight #2: Meringue’


This video recipe is available at - https://youtu.be/PBjw79bZEb4.

Choc-Mint Mousse – Intermediate – from ‘Spotlight #3: Chocolate’


This video recipe is available at - https://youtu.be/sQyNdu_IGTs.

Enjoy!
--- Blake

4 September 2015


Season 2 BONUS Recipe #2: Donuteroles – Intermediate – Baking & Desserts


My loyal readers (I’m sure you’re out there somewhere), this is probably the recipe I’ve been most excited about since I started, and it’s been extremely difficult to not just throw it out there randomly during Season 2. But I have a format, so I need to stick to it as much as possible. So, I’ll start at the beginning…

A few years ago everyone was going crazy over a certain croissant/donut hybrid (you’d have to be living under a rock to have not heard about it/seen a picture of it/ignored someone obsessing about it/eaten it/etc.). Over the last 12 months the hype seems to have died down a bit, leaving a vacancy for the next food fad. For your consideration, I submit to you: the Donuterole.

So, if you haven’t put together the name and the picture and are still wondering “what the heck is a Donuterole?”, the answer is: a profiterole masquerading as a donut.

Take choux pastry, pipe it into a donut ring, bake, fill with crème pâtissière, top with a chocolate glaze and sprinkles, then try to stop yourself from eating the whole tray. And this is just the BASIC variety. You can have different flavours of choux pastry, different fillings, different toppings… honestly, there’s so much room for creativity!

I've done some looking around, and surprisingly nobody really seems to have developed this area yet.

Ingredients:
100g dark chocolate, broken into pieces
30g unsalted butter, cubed
2 tbsp glucose/light corn syrup
1 tbsp water
Spinkles, to decorate

Remember, this is just a guide. If you want to use a different topping or filling feel free to do so.

Method:

1. Preheat oven to 200°C (approx. 390°F).

2. Pipe the choux pastry into a donut ring baking tray. (Only pipe a small circle, because they’ll puff up quite a lot! The pans are usually non-stick and there’s a lot of butter in the pastry which should stop it from sticking, but if you feel like playing it safe feel free to oil the trays with some cooking spray.)


3. Bake for 25-35 minutes, then turn off the heat and allow the pastry cases to sit in the oven for a further 15-20 minutes with the door ajar. (As usual, I just prop it open with a wooden spoon.)

4. Remove from the oven and allow to cool before you pierce the top with a skewer in 4 places. (This makes it easier to fill evenly.)


5. In a heatproof bowl over a saucepan of simmering water, melt together the chocolate, butter, glucose and water until smooth, then place aside to cool slightly.

6. Pipe the crème pâtissière into the pastry cases using the holes you made. (You should know when it’s filled evenly. Try not to underfill.)


7. Dip the tops of the Donuteroles into the glaze to seal the holes, then place onto a rack and cover with sprinkles.

8. Place into the fridge until the glaze is firm, then serve.

Makes 8-12 (depending on how you pipe the pastry).

A video of this recipe is also available - https://youtu.be/Nj7NuJLb_IM.

Well, this is the end of the Season 2 BONUS Recipes. I’ll be back in a few weeks with Season 3. I hope you’ve had some fun cooking these dishes. Feel free to let me know how they turned out, or if you have any questions or suggestions.

28 August 2015


Season 2 BONUS Recipe #1: Choc-Orange Cheesecake – Intermediate – Baking & Desserts


The bonus recipes are back! As with last season, these are really just alternate ways of using previous recipes from throughout the seasons to end up with a completely different dish.

This no-bake cheesecake seems to go down well at parties, or morning/afternoon teas, or really just any time of the day for any reason whatsoever. Since when did cheesecake require a justification?

Ingredients:
1kg cream cheese, at room temperature

This time, you’ll need to change a couple of things around, but I’ve already told you what to do in the relevant videos.

I’ve listed that you can use either dark or milk chocolate ganache here as it’s purely up to your preferences. You will obviously get a richer flavour from dark chocolate, but it won’t be as sweet as it would were you to use milk chocolate. You could even use white chocolate if you really want, but the end result may not look as dramatic.

Method:

1. Press the biscuit crumb mixture into a 20cm (8 inch) cake tin with a removable base, ensuring that it is distributed evenly and that it comes all the way up the sides.


2. Place the tin into a fridge for at least 20 minutes in order for the base to harden.

3. Use an electric mixer to beat half of the cream cheese into the orange curd, then cover and place aside until needed.


4. Beat the remaining half of the cream cheese into the ganache, cover and place aside until needed.


5. Spoon half of the orange cream cheese mixture into the biscuit base and spread evenly to the edges.


6. Place your tin into the freezer for 15-20 minutes or until the cream cheese is firm enough to handle the next layer.

7. Repeat Step 6 with the chocolate cream cheese mixture.


8. Return tin to the freezer for 15-20 minutes or until firm enough to handle the next layer.

9. Repeat Steps 6-9 with the remaining halves of each mixture, then place into the fridge to chill overnight before serving. (You should now have 4 layers of cream cheese.)

10. All to rest outside the fridge for at least 20 minutes before removing from the tin and serving. (Otherwise it can be a bit difficult to cut.)

Serves at least 1.

A video of this recipe is also available - https://youtu.be/-TGuy7NJiPc.

22 August 2015


2.12 Lasagne – Advanced – Rice & Pasta


Okay, okay. I know some of you are saying or thinking “but why has he listed LASAGNE as ADVANCED???”. Well, to put it into perspective, you need to make a Bolognese sauce and a Béchamel sauce (both of which are either time consuming or fussy), then assemble everything and bake it for the right amount of time. The full recipe can take more than 3 hours from beginning to end.

Advanced doesn’t necessarily mean “difficult”, but there’s more to it than throwing a few jars of sauce at some pasta sheets and shoving the whole thing in the oven!

ALSO - This is the final episode of Season 2. I'll be back with Season 3 on 2nd October 2015, but there'll be a couple of bonus recipes before then.

PART A – BOLOGNESE SAUCE


As usual, I don’t know how traditional this is as nobody taught me how to make it. You can use this sauce over some pasta if you don’t feel like going the full Lasagne route.

Ingredients:
400g Italian pork and fennel sausages, removed from casings
500g lean beef mince
2 large red onions, diced finely
3 large garlic cloves, minced
800ml passata
500ml beef stock
200ml boiling water
150ml red wine
¼ cup chopped fresh oregano leaves
½ cup chopped fresh basil leaves
2 tbsp tomato paste
½ tbsp black truffle salt (see notes below)
Pepper
Olive oil (for frying)

I have specified Italian pork and fennel sausages. This is because they seem to have a higher percentage of meat when compared to other sausages, plus the flavours work. If you want to use plain pork sausages (or another flavour you like), then go right ahead. If you want to get rid of the pork completely, then I guess beef sausages could work, or just use extra mince.

I would recommend lean mince in this as there’s probably already going to be a bit of fat in the sausages, plus you’ll need to add some oil for frying. You can use ordinary beef mince (I usually do), but if you want to get all fancy, feel free to use Angus or Wagyu beef instead. Traditionally, you should be using veal mince anyway.

Passata is just a smooth tomato puree. If you can’t get it, blend a few tins of tomatoes until smooth.

The type of wine doesn’t matter. Just use anything you have laying around. I’m not really a wine connoisseur.

If you can’t get fresh basil and/or oregano, use 1 tbsp dried oregano and/or 2 tbsp dried basil instead.

I use truffle salt to add a hint of additional flavour. If you don’t like truffles, don’t worry, you can substitute it with plain salt and still have a great lasagne. Or, you could use another type of specialty salt, such as smoked sea salt, black sea salt, pink  salt, etc. Not all salt tastes the same. You could even drizzle some flavour-infused oil over the top when you serve it.

Method:

1. In a large pot over medium-high heat, fry the onions in some olive oil with a generous pinch of salt until softened, then add the garlic and fry until browned.

2. Add the sausage meat and cook until browned. (Try to break up the meat as much as possible.)


3. Add the beef mince and cook until browned.

4. Stir in the red wine and allow to simmer for approx. 30 seconds to remove some of the alcohol.

5. Stir in the tomato paste, passata, stock, water, chopped herbs, truffle salt and a generous pinch of pepper. (TIP: I would usually pour the water into the empty passata bottle and shake it up to get anything stuck to the sides.)

6. Once it comes to a simmer, reduce heat to low and cover the pot.


7. Simmer sauce for 2 hours, stirring every 15-20 minutes. (You don’t need to be too diligent here. Leave the sauce to do its thing, just go check on it from time to time. You don’t want the sauce to be too thin, but you also don’t want it to be too thick as the pasta sheets will absorb some liquid as it cooks later.)

8. Once the sauce is done, put aside until you are ready to assemble. (Like all Bolognese sauces, this gets better if you leave it in the fridge overnight. Just heat it up a bit before you use it to make it easier to pour and spread.)

Makes enough for 1 Lasagne, or several serves of Spaghetti Bolognese.

A video of this part of the recipe is also available - https://youtu.be/lATn05YwnTI.

PART B – BÉCHAMEL SAUCE


A fairly standard white sauce. Of course, I have to mess with it a bit (it’s kind of my thing), but I don’t go too crazy with it.

My mother tells me that adding cheese to a Béchamel sauce makes it a Mornay sauce (and from what I can see she's correct), but I don't think I add a large enough amount of cheese to make the distinction. If you have to, then call this a Mornay sauce. Or a Béchamornay. Whatever!

Some people like to use ricotta in their lasagne instead of Béchamel. They are to be pitied.

Ingredients:
1L milk
100g unsalted butter, cubed
½ cup plain white flour
1/3 cup grated parmesan cheese
½ tbsp black truffle salt
½ tsp pepper
Extra milk (if necessary)

The truffle salt is back again! As before, feel free to substitute it for another salt.

You may not need the extra milk, it depends on how thick you want the sauce.

Method:

1. Over a medium heat, melt the butter in a pot.

2. Once it is bubbling, add the flour and whisk until combined. (This is called a ‘roux’ (pronounced “roo” for those of you who are wondering).)


3. Continue to whisk the butter and flour over the heat until the roux begins to darken to a light nut-brown colour. (Be careful, you don’t want it to burn.)

4. Pour in the milk and whisk constantly until the sauce has thickened to a custard-like consistency and remove from the heat. (The longer it cooks, the thicker it will get.)

5. Whisk in the parmesan cheese, truffle salt and pepper.


6. If mixture thickens too much, add extra milk as necessary until proper consistency is retained.

7. Place aside until you are ready to assemble.

Makes enough for 1 Lasagne.

PART C – ASSEMBLING THE LASAGNE


Ingredients:
approx. 12 Fresh Pasta sheets
3 cups Mozzarella cheese, grated
½ cup Parmesan cheese, grated
Black truffle salt (optional)
Pepper (optional)

There is no real art to this. The amount of each of the above ingredients used is really up to you, and depends on the size, height and depth of your baking dish, as well as how generous you are with the Bolognese and Béchamel.

Fresh pasta sheets seem to work much better than dried, and do not take as long to cook in the oven. If you feel more confident with dried pasta sheets, then use them instead, but don’t blame me if it doesn’t work out the same!

Method:

1. Preheat oven to 180°C (360°F).

2. Pour a generous spoonful of the Bolognese sauce into the bottom of your baking tray and spread it to the edges. (This gives the first layer of pasta something to rest on and stops it from sticking to the pan.)

3. Place the pasta sheets in a single layer over the Bolognese. (Try not to overlap. TIP: If there are any large gaps, just cut or tear an extra pasta sheet into strips to fill the gap.)


4. Pour another couple of spoonfuls of Bolognese over the pasta and gently spread to the edges of the dish.

5. Pour over 1/3 of the Béchamel sauce as evenly spread as possible. (Don’t be too concerned if it doesn’t look even, you can press down on the next layer of pasta sheets to spread it out.)

6. Scatter a small handful of mozzarella over the Béchamel. (Optional – you need to have enough Mozzarella leftover to cover the top layer, so be a bit stingy with it between the layers.)


7. Repeat Steps 3-6 as necessary.

8. Once the dish is full, scatter over as much mozzarella, parmesan, truffle salt and pepper as you’d like.

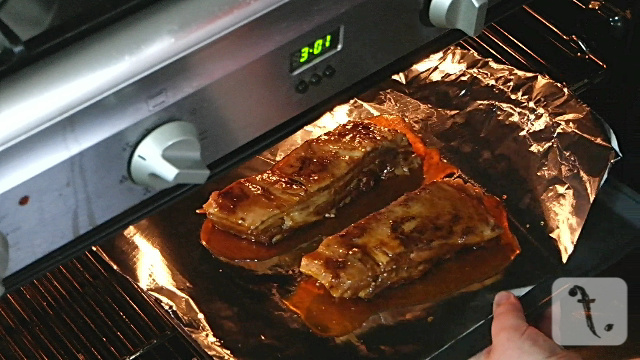
9. Bake for 45 minutes. (The pasta sheets should be cooked by now.)

10. Allow to cool for 5-10 minutes, and then serve. (A simple garden salad goes well with this.)

I’ve made this for a broad range of people, and based on this experience it can serve anywhere from 6-12.

A video of this part of the recipe is also available - http://youtu.be/Rz2FOAWQ36g.

I hope you've enjoyed Season 2, and I'll see you again soon!