10 March 2017

6.05 Poached Pears w/ Yogurt Syllabub - Baking & Desserts - Low-Fuss


The main problem with a season like this is trying to include sweet recipes that are still considered light. As a result I've had to be a bit inventive using fruit, and this week is obviously no exception. 

Usually pears would be poached in a sugar and wine syrup, however my version found a lighter and less complicated way: just use fruit juice instead! As a result, this dessert has almost half the calories of the regular dish (depending on how you serve it, of course).

Recipe makes 4 serves
337 calories (1410 kilojoules) per serve
10.8 grams of fat per serve

For those of you wondering, syllabub is a type of English dessert made by mixing sweetened cream with an acid such as lemon juice. As usual, I won't make any claims that this version is at all traditional.

PART A - POACHED PEARS


Ingredients:
4 large pears
600ml apple & blackcurrant juice
1 tsp vanilla paste/extract/essence
1 cinnamon stick
2 star anise

This recipe should work with basically any variety of pear - assuming they're ripe enough - but feel free to use one that poaches well.

I chose apple & blackcurrant juice as it has a nice balance of sweet and tart flavour, plus it imparts some colour while the pears poach. Other possibilities could include pomegranate or cranberry juice.

Method:

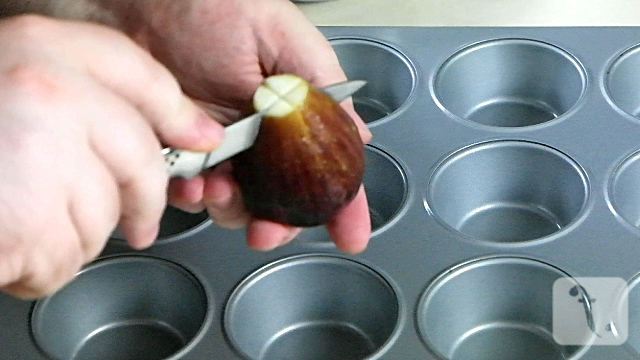
1. Peel the pears. (Seems fairly straightforward so far, right?)

2. Slice the pears in half lengthways, then remove the cores. (TIP: Use a melon-baller for this.)


3. Pour the juice into a large pan. Add the vanilla, cinnamon and star anise, stir together then place over a medium heat.

4. Once the juice is simmering, place the pears cut-side down into the pan. Allow to poach for approx. 25 minutes, occasionally spooning some of the juice over the tops of the pears.


5. Turn the pears over and poach for a further 10 minutes or until the juice has evaporated down to a syrup.

6. Place the pears and syrup into a bowl, cover, and place aside until serving. (NOTE: These can be served cold or warm and can be stored in the fridge for a few days until needed.)

PART B - YOGURT SYLLABUB


Ingredients:
1/2 cup low-fat greek yogurt
100g extra thick cream
2 tbsp honey
Zest of 1/2 orange

The yogurt provides the required acidity as well as some creaminess.

By extra thick cream I mean it should be thick enough to dollop, basically the same consistency as sour cream.

Method:

1. Place all ingredients into a bowl.


2. Mix together until combined.

3. Serve with the poached pears (or whatever).


Serves 4.

A video of these recipes is also available at https://youtu.be/NLo986QsD3Y.

2 March 2017

6.04 Zucchini Pasta w/ Fetta & Walnuts - Rice & Pasta - Low-Fuss


Okay, so this is a cheat - it's not actually pasta. This recipe uses shredded zucchini as a substitute which cuts out a large amount of calories and fat, but I've thrown in enough different flavours to make up for the deception.

An important thing to note is that to make this dish you will preferably have a spiralizer. If you're not familiar which this particular tool, I suggest you Google it and get one as soon as possible because they're fairly useful (and strangely fun to use).

Recipe makes 2 serves
441 calories (1845 kilojoules) per serve
31.1 grams of fat per serve

I did consider listing this recipe as making 3 serves, but let's face it; no matter how much you dress it up, this dish is essentially a glorified warm salad, and dividing it into 3 may just leave everyone hungry.

Ingredients:
3 large zucchini
1/3 cup walnuts, chopped
100g reduced fat fetta cheese, crumbled
2 tbsp fresh mint, chopped
1 1/2 tbsp extra virgin olive oil
2 cloves garlic, minced
Zest and juice of 1/2 lemon
Salt & pepper

When I say "large zucchini", I mean around 25cm long and 5cm diameter at the thickest point. If you can only get smaller ones, then adjust as necessary.

Don't be turned off by the mint, it's not really a huge amount and it really helps to balance the flavours. If you absolutely can't stand it, just replace it with oregano, parsley or basil.

Method:

1. Shred your zucchini into long threads using a spiralizer. (If you don't have one, as a backup you could use a vegetable peeler or mandolin to slice the zucchini into thin ribbons - although this will take longer and you may not get the ideal result.)


2. Place the oil and garlic into a cold frypan and stir to distribute around the pan evenly, then place the pan over medium-high heat. (This will allow the garlic to infuse the oil more.)

3. Once the garlic starts to sizzle, add in the zucchini threads along with a generous pinch of salt and stirfry for approx. 5 minutes or until it softens to the texture of cooked pasta.


4. Add in the walnuts and fry for a further minute or so before stirring in the lemon (zest and juice) and mint.

5. Remove from the heat and stir in the fetta along with a generous pinch of salt and pepper.


6. Serve!

Serves 2-3, or can also be used as a side dish if preferred.

A video of this recipe is also available at https://youtu.be/Ub-umbLkT-E.

21 February 2017

6.03 Baked Figs w/ Ricotta & Cinnamon - Baking & Desserts - Low-Fuss


This simple little 4 ingredient recipe can be either a breakfast, a dessert, or a light snack. Because this is the "healthy" season, in order to have some sweet recipes I've had to explore using fruit in a way that I wouldn't usually do.

For instance, I'd never tried a fresh fig before testing this dish out; just the dried ones (which sometimes aren't particularly good). If you're in the same boat, let me assure you - fresh figs are great! I had to struggle not to do too many "taste tests" for this one. Not that there's anything wrong with that...

Recipe makes 6 serves
106 calories (444 kilojoules) per serve
1.4 grams of fat per serve

6 serves may seem like a stretch, but part of eating healthier is portion control. That being said, if you doubled-up the serves, this is still not bad for you!

Ingredients:
6 fresh figs, rinsed and dried
150g reduced-fat ricotta cheese, slightly crumbled
1/3 cup agave syrup
1 tsp ground cinnamon

The figs should be ripe, but not TOO ripe (otherwise they fall apart fairly easily).

I would choose fresh ricotta over the pre-packaged stuff, not only because it TASTES fresher but because there tends to be a higher salt content in pre-packaged ricotta (most likely as a preservative). This extra salt can throw off the whole dish. Also, if you want to use full-fat ricotta, that's obviously not going to be as low in calories or fat as reduced-fat ricotta - but it should taste great!

You can substitute the agave syrup for honey if it's easier. Agave syrup is only slightly lower in calories than honey, but I also find it works better as a syrup because it's runnier than honey plus it's not such a cloying sweetness.

Method:

1. Preheat oven to 200°C (390°F).

2. Slice the stalk off one of the figs. Cut down the fig almost to the bottom, then do this again so you have cut a cross.


3. Open up the fig slightly, then place into a muffin tin.  (This will keep the figs upright while baking.)

4. Repeat Steps 2 and 3 until you have used all the figs.


5. Mix together the agave syrup and cinnamon until combined.

6. Drizzle approx. 1 tsp of the syrup over the top and inside each fig.


7. Place the figs (in the muffin tray) into the oven and bake for 5-10 minutes. (Just long enough to soften them up and warm them through.)

8. Transfer the figs to serving plates and place approx. 2 tbsp of ricotta inside each fig.


9. Drizzle a further 2 tsp of syrup over the top of each fig, then serve. (Garnish with a sprig of mint if you want to make it look a bit more exciting.)

Serves 6 (or 3, or 2... or 1)

A video of these recipes is also available at https://youtu.be/o-azCzbiHrk.

14 February 2017

6.02 Crispy-Skin Salmon w/ Warm Potato Salad - Seafood - Low-Fuss


Just in time for Valentine's Day, here's a quick and simple-to-prepare meal for 2! I would recommend it more as a lunch (because of the carbs again) but it's probably fine as a dinner as well. All up, it takes approx. 20-25 minutes from beginning to end.

This recipe was actually based on fish & chips with tartare sauce - a guilty pleasure of mine. I've attempted to hit similar textural and flavour marks while keeping things as light as possible.

Recipe makes 2 serves
498 calories (2084 kilojoules) per serve
28.9 grams of fat per serve

While the calories and fat in this dish may seem excessive, it's important to remember that 1) the general recommended caloric intake is 2000 per day on average; 2) the general recommended fat intake is 65 grams per day on average; and 3) so long as you structure your meals appropriately for the rest of the day this is perfectly acceptable.

Besides, most of the calories and fat come from the salmon, and fish oil has several health benefits. There's more to eating better than cutting out fat altogether.

Ingredients:
2x salmon fillets (approx. 175g each), skin on
350g potato, peeled and diced
1/2 cup green beans, sliced
1/3 cup low-fat greek yogurt
1 tbsp capers
1/2 tbsp olive oil
Dill (to taste)
Lemon wedges (to serve)
Salt & pepper

Obviously if you don't get salmon with the skin on you can't have crispy skin. If you choose to go the skinless route this recipe should still give you a decent result regardless. If you can't get salmon, I'm sure trout is also sold as fillets with the skin on and shouldn't be very different as an alternative.

I'm not going to specify a particular type of potato, just use something that's good for boiling. To get the right amount you'll need 2-3 decent sized potatoes.

As an alternative to green beans, you could also use sugar-snap peas, snow peas, or even just regular peas if you can find them fresh and out of the pod. I encourage you to adapt my recipes however you see fit.

On the topic of alternatives, you can use full-fat greek yogurt if you're not overly concerned by what you're eating. Plain/natural yogurt should also be fine.

As for the dill... well I'm not really a fan of it myself, with the exception of a few dishes (including this one). You don't need much anyway, just a few sprigs. Or feel free to swap it for something like tarragon or basil.

Method:

1. Place the potatoes into a pot, then cover with water from a recently boiled kettle (to save time). Place on a medium-high heat and boil for 15-20 minutes or until cooked (but not too soft)


2. Dran the potatoes and place into a bowl with the beans. Stir together and place aside to cool for 5-10 minutes while you continue with the recipe. (The heat from the potatoes should soften the beans a bit, but they'll basically still be raw and have some nice texture to them).

3. In a bowl, mix the oil with a pinch of salt and pepper. Then, brush the skin side of each salmon fillet with a generous amount of seasoned oil.


4. Place the fillets skin-side-down into a frypan over medium-high heat and allow to fry for 1 1/2 to 2 minutes, then brush the other side of the fillets with any leftover oil, flip them over and fry for a further 60-90 seconds.

6. Flip the fillets onto one side and fry for 30-60 seconds before flipping onto the other side and cooking for another 30-60 seconds.

7. Flip the fillets back on to the skin side for a final 30-60 seconds before removing from the heat and allowing to rest or a couple of minutes while you continue with the recipe. (Total cooking time for the salmon is 5-6 minutes, it will still be slightly pink in the centre which is the way salmon is usually served.)


8. Into a food processor, place the yogurt, some dill (or whatever you decide to use), the capers, and a generous pinch of salt and pepper. Blend to your desired consistency (a.k.a. chunky or smooth). (TIP: If you don't have a food processor, just chop the capers and herbs by hand and mix with the yogurt, salt and pepper.)

9. Pour the dressing over the slightly-cooled potatoes and beans and mix until everything is coated.


10. Serve half of the potato salad with each salmon fillet and a wedge of lemon (for those that want it).

Serves 2.

A video of these recipes is also available at https://youtu.be/Y3PptSEeB5Y.

7 February 2017

6.01 Buckwheat Pancakes w/ Wildberry Syrup - Breakfast & Brunch - Low-Fuss


What better place to start the new season than with breakfast? I know some of you may be dubious as to how exactly this fits into a "healthy" season, but using the right ingredients it's actually not as bad as you'd think. Which brings me to the stats for this dish:

Recipe makes 4 serves
417 calories (1745 kilojoules) per serve
7.75 grams of fat per serve
(*when made with Erythritol)

See, not so bad, right? It's also worth adding that the recipe is completely gluten free with no added sugar. For those of you wondering about all the carbs, well, this is a breakfast dish. If you're going to have a carb-heavy meal it's best to do it at the beginning of the day so you have plenty of time to burn it off.


PART A - WILDBERRY SYRUP


So the "wildberry" part of the title may be a bit of a misnomer as I'm fairly sure almost none of the berries you buy commercially are actually wild-picked anymore, but everyone else says it, so...

Ingredients:
200g mixed berries
3/4 cup maple flavoured syrup

You can use fresh or frozen berries - obviously fresh would be better - and whatever combination you prefer. I use equal parts raspberry (for tartness and colour), blackberry (for colour and texture) and blueberry (for sweetness).

While I'd usually go out of my way to use pure maple syrup in my food, in this case the maple flavoured syrup better suits the "healthy" idea, having a mind-boggling SEVEN TIMES LESS calories than pure maple syrup. While some people may have issues with the sweeteners used, you can't really argue with that statistic. It may vary from brand to brand, but if you're confused just have a quick look at the nutritional values on the bottle.

Method:

1. Place the berries and syrup into a saucepan, stir together and place over a medium heat.

2. Once it starts to simmer, let it bubble away for 5-10 minutes, stirring occasionally, until the berries begin to break down and release their juices.


3. Turn off the heat and allow to cool for around 15 minutes before serving. (Because putting boiling syrups into your mouth is never a good idea, plus this gives you time to make the pancakes!)


PART B - BUCKWHEAT PANCAKES


As mentioned above, these are both gluten free and sugar free. It turns out that "buckwheat" is also a misnomer as it isn't a type of wheat at all! This recipe is just one big stack of contradictions... although they are tasty contradictions.

Ingredients:
1 1/2 cups buckwheat flour
1/2 cup quinoa flakes
1/3 cup natural sweetner (such as xylitol, stevia, erythritol, etc.)
400ml buttermilk
2 eggs
1 tsp baking powder
1 tsp bicarbonate of soda
1 tsp vanilla extract or paste
1/2 tsp salt
1 tsp vegetable oil (for frying)

The quinoa flakes are really just there to add a bit of body to the pancakes so you feel full. If you can't find them then you can replace this with the same amount of quick-oats instead, however this stops the recipe from being gluten free.

Most people are already familiar with stevia, but I've recently discovered xylitol and erythritol which are made from sugar alcohols - which are neither sugar NOR alcoholic, just to continue the theme I seem to have going here - and are therefore considered natural. Xylitol has around half the calories of sugar but erythritol, like stevia, has basically no calories at all (or at least very few). If you're unsure about which to use, I suggest you do a bit of research to see the pros and cons of each.

Method:

1. Place the buckwheat, quinoa (or oats), sweetener,  baking powder, bicarb and salt into a large jug (or a bowl with a pouring lip) and mix until evenly dispersed.


2. In another jug, place the buttermilk, eggs and vanilla and whisk together until combined.

3. Pour the buttermilk mixture into the buckwheat mixture and whisk until you have a fairly smooth batter. (There will be some lumpiness caused by the quinoa flakes or oats, but that's fine.)


4. Heat a pan over medium-high heat, then add the cooking oil and use some kitchen towel to wipe it around the pan to make a thin coating.

5. Pour out blobs of batter approx. 7cm (2.5 in) wide, taking care not to overcrowd the pan.

6. Fry for 1 and a half to 2 minutes before flipping. (Bubbles will begin to apear on the top of the pancakes within the first minute, but you should wait until the outer edges of the pancakes are slightly set before attempting to flip them over. People tend to get a bit anxious which is the real reason why the first batch of pancakes is never quite right.)


7. Fry for a further minute or so on the other side before removing from the pan.

8. Serve warm with syrup.

Makes 12 (serving size is 3 pancakes plus 1/4 of the wildberry syrup).

A video of these recipes is also available at https://youtu.be/nyrTycqZCSs.

2 February 2017

Hi all! The time has come for another new season, and I'm more than a little excited about this one.

Whether you've made a New Year's resolution to lose weight, or are a bit of a health nut, or just want to make a change to your diet now and then - this is the season for you! Proudly presenting: FoodPoint Lite.


This new mini-season showcases healthier alternatives for any meal, but done in a way that shouldn't feel like you're sacrificing anything. Plus, all recipes are Low-Fuss! Because eating better shouldn't be a hassle, should it?

Sometimes the hardest part of maintaining a better eating plan is a lack of options - trust me, I've been there many times! Hopefully this season gives you just that little extra boost to help you on your way. And for those few that are not into "that healthy stuff", these recipes should still satisfy your appetite! Give it a go. ;)

FoodPoint Lite starts 30th January 2017. Check out the trailer at https://youtu.be/Q1oAaNGf4WU.

Enjoy!

--- Blake

6 January 2017

Season 5 BONUS Recipe: Rosca de Reyes - Baking & Desserts - Advanced


I should start by acknowledging the absolute chaos that ensued in the making of this recipe. I won't go too far into specifics, but between lost memory cards, vanished ingredients, an ill-timed police visit and a smashed studio light I managed to get it all done in just over 5 hours.

Now, on to the recipe itself - some of you may be wondering what a Rosca de Reyes is? Truth be told, I'd never heard of it myself until conducting research on Mexican Christmas foods. It's a sweet bread akin to a brioche or panettone that's traditionally baked and eaten on Epiphany, which falls on 6th January (so I'm just in time!). Loosely translated, the name is "three kings' bread".

I'm not going to claim that this is a traditional Rosca de Reyes. It doesn't really look like most of the photos I found around the web in my research, and a few of the ingredients I went for are definitely not traditional. I also left out the part where religious figurines are baked into the bread as I decided it would be disrespectful coming from someone who doesn't follow the faith.

Sorry if anyone is offended anyway, there's nothing I can do about that! ;)

Ingredients:
4 1/2 cups plain flour
400g dried fruit
150g unsalted butter, cubed
2/3 cup milk
2/3 cup caster sugar
7g sachet instant dried yeast
1/2 cup slivered almonds
1/4 cup pine nuts
60ml rum
1 orange
2 eggs
2 egg yolks (extra)
2 tsp ground cinnamon
1 tsp vanilla extract/essence/paste
1/2 tsp salt
1/2 tbsp imitation saffron powder (optional)
Glace cherries, dried apricots, blanched almonds (for decorating)

Quite the list, eh?

Feel free to use strong white bread flour for this recipe.

In relation to the dried fruits, I used a combination of sultanas, mixed peel, dried cherries, currants and some dried figs and apricots that I cut into cubes. Use whatever you prefer.

The imitation saffron isn't because I was being a cheapskate, I just think that you want the colour without the saffron flavour for this recipe. You could probably get away with any yellow food colouring if you decide not to keep it au naturale.

Method:

1. Add the zest and juice of the orange to a saucepan along with the rum. Place over a medium heat until it just begins to simmer, then pour this over the dried fruit, mix together and set aside to soak for 15-20 minutes.


2. Place the butter, milk and vanilla into a saucepan. Warm over a medium heat, stirring, until the butter has melted. Remove from the heat and place aside to cool.

3. In a large mixing bowl, mix together the flour, yeast, sugar, cinnamon, salt and saffron powder until combined, then make a well in the centre.

4. Add the eggs (including the additional yolks) and cooled milk and butter mixture and mix until you have a sticky dough.


5. Add in the soaked fruit and nuts and mix until dispersed.

6. Scatter some additional flour on your work bench, pour out the dough and top with another scattering of flour.

7. Knead the dough for approx. 10 minutes, it will become less sticky the more you work with it. (You can instead use a benchtop mixer to knead the dough for approx. 5 minutes.)


8. Transfer dough to a large oiled bowl, cover with cling film and place into a warm, draft-free area to rise for approx. 2 hours or until doubled in size.

9. Punch the dough to knock the air out, then scatter some more flour onto your bench and give the dough another quick knead (1-2 minutes).

10. Roll the dough into a log, then join the ends together and shape it into a ring. Transfer to a baking sheet lined with some baking paper, cover with a damp kitchen towel and place in a warm place to rise for another 2 hours. (Now you see why it took over 5 hours!)


11. Preheat oven to 180°C (350°F).

12. Brush the dough ring with some eggwhite (you should have some leftover after using the yolks) and decorate as desired.


13. Bake for 40-50 minutes or until cooked. (It should have a hollow sound when the base is tapped, although this is difficult to test directly from the oven. Just use your best judgment.)

The ring I made would have served 12-24 quite generously. Try it toasted with some butter and jam!

A video of this recipe is available at https://youtu.be/YDo6WsVpVLc.

And that's officially the end of FoodPoint Fiesta! It's been fun for me, so I hope you enjoyed it too. Keep an eye out for updates on the next FoodPoint series!

21 December 2016

5.08 Sopapillas w/ Cajeta - Party Food - Intermediate


Up to the final entry of FoodPoint Fiesta already! And what better way to end it than with something sweet?

I discovered cajeta while I was researching foods for this season. It's a thick, rich caramel very similar to dulce de leche, with a couple of notable differences which I'll cover further down. The real challenge was finding some way to use cajeta that didn't deviate too much from the season identity.

I'd already cooked churros way back as a bonus in Season 1, so what other options did I have? A little more research turned up sopapillas, a lesser-known fried-dough treat that can be paired with dishes both savoury and sweet

Put them together and you get a surprisingly satisfying combination.

PART A - CAJETA


I've seen a lot of people around the internet refer to this as "Mexican caramel" or "Mexican dulce de leche".  As mentioned above this is a fair assessment, however in order to explain the differences between cajeta and dulce de leche you first need to examine what it's made from.

Ingredients:
1L goat milk
3/4 cup caster sugar
1/2 tsp bicarbonate of soda
1/2 tsp salt
1 cinnamon stick
1 vanilla pod

Whereas dulce de leche would use cow's milk, cajeta uses goat's. Goat milk is more stable for the purposes of this recipe, plus it has a slightly tangy note that stops the caramel from being too cloyingly sweet.

The bicarbonate of soda is the real hero of this recipe. It causes a chemical reaction that lowers the boiling point of the milk, meaning that you're able to leave it simmering for a long time without it reaching the point where the milk would split.

In this recipe I tend to use pink salt, but you can really just use whatever type you prefer.

Cinnamon is also not something you would find in a typical dulce de leche, and it adds a pleasant, subtle warmth to the caramel. If you can't get a stick, just use a teaspoon or two of ground cinnamon.

You can also use vanilla paste/extract/essence instead of the pod if it's easier.

Method:

1. Get yourself a saucepan with a volume of at least 3 litres. (May seem like an odd start to a recipe, however the reason will become apparent later). 

2. Split the vanilla pod and scrape out the seeds. Place this into the saucepan along with the cinnamon, sugar, and salt.


3. Measure out a couple of teaspoons of the milk and place aside for later in the recipe, then pour the rest into the saucepan and stir everything together to start to dissolve the sugar.

4. Place the pot over a medium heat until it just starts to simmer, then turn the heat off completely.

5. Add the reserved milk to the bicarbonate of soda and mix together, then pour this into the saucepan while stirring continuously. (WARNING: It will immediately start to fizz and expand, so go right to Step 6!)


6. Keep stirring the mixture to ensure it doesn't bubble over, it will take a few minutes for the bubbles to subside. (This is why you need such a large saucepan for such a small amount of mixture. I personally wouldn't exceed a saucepan with 4 litre volume as this could cause issues for the rest of the recipe, but anything smaller than 3 litres will probably result in a mess and a need to start again.)

7. Once the bubbling has subsided, turn the heat back on - this time to medium-low - and simmer the mixture for approximately 1 and a half hours, stirring every 10-15 minutes so it doesn't catch on the bottom of the pan. (As it simmers, you will see it getting darker and thicker.)

8. When the mixture reaches the consistency of pouring custard, remove the cinnamon stick and vanilla pod, then keep on stirring until thick.


9. Pour into a serving bowl and allow to cool for a few minutes before serving. (It will be incredibly hot right out of the pan. TIP: This stuff is awesome with just some plain vanilla ice cream!)

Yields approx. 250ml (1 cup) of cajeta. It may not seem like a lot, but a little bit goes a long way.


PART B - SOPAPILLAS


Wikipedia says "a sopaipilla, sopapilla, sopaipa, or cachanga is a kind of fried pastry and a type of quick bread served in several regions with Spanish heritage in the Americas".

Basically, it's a semi-sweet, doughnut-like pastry. If you don't douse them with icing sugar, cinnamon and honey (or cajeta) then they are savoury enough to be dunked into spicy meat dishes.

Ingredients:
2 1/2 cups plain white flour
1/2 cup milk, warm
1/3 cup water, warm
50g lard, cubed
1 tbsp baking powder
1 tbsp caster sugar
1/2 tsp salt
Oil (for deep frying)
Icing sugar and cinnamon (for dusting, optional)

Instead of goat's milk, this time you'll want ordinary cow's milk.

If you don't want to use lard (for some bizarre reason) feel free to use vegetable shortening instead.

Finally, I would use regular table salt for this recipe instead of pink salt.

Method:

1. Place all the dry ingredients into a bowl and mix together until dispersed.

2. Add the lard (or shortening) and rub into the dry ingredients until you're left with something that resembles bread crumbs.


3. Make a well in the centre of the flour mixture, then pour in the wet ingredients and mix until everything starts to come together into a dough.

4. Scatter some flour onto a bench and turn out the dough. Knead for 5-10 minutes or until smooth and springy. (You can use a benchtop mixer with a dough hook if you prefer, however it's not a particularly demanding job.)


5. Shape the dough into a disc, wrap with clingfilm and leave to rest for 20-30 minutes.

6. Once rested, dust with some more flour and cut the dough into quarters.

7. Roll each quarter out into an oblong shape approximately 1/2 centimetre thick, then slice each oblong into 6 fairly uniform square or rectangular shapes and place aside until needed.


8. Preheat your deep fryer oil to 190°C (370°F).

9. Take a piece of dough and place one edge into the oil. Once it starts bubbling, let it go. When the dough floats to the top, flip it over so that it rises evenly. Continue to fry while turning occasionally until golden brown, then remove from the fryer and drain on some paper towels. (It takes approx. 3-4 minutes for each sopapilla to cook.)


10. Repeat Step 9 in batches until all the dough is cooked.

11. Serve while still warm. If you're going the sweet route, dust with some cinnamon and icing sugar. Traditionally you can also drizzle them with some honey, but that's not necessary if you and serve with the cajeta.

Makes approx. 24.

A video of these recipes is available at https://youtu.be/ZXRdexIqNds.

13 December 2016

5.07 Grilled Pineapple - Baking & Desserts - Low-Fuss


Onto the desserts!

I had a bit of difficulty choosing which desserts to include in this season as there are so many different varieties. In the end, after going to a Churrasco restaurant for my birthday dinner, I was inspired to go with this.

Warm and juicy and sweet an sour with just a hint of caramel, this dessert is incredibly satisfying (and not too naughty, either!).

Ingredients:
1 pineapple
1 lime
1/4 cup brown sugar
1 tbsp ground cinnamon

Only 4 ingredients, how could you go wrong?!

Method:

1. Trim the ends off the pineapple, then slice it in half down the middle lengthways. (Count: You'll now have 2 pieces of pineapple.)


2. Cut each half into halves again, then remove the core from each quarter. (Count: You'll now have 4 pieces of pineapple.)

3. Cut each quarter into 2 pieces, then use a small, sharp knife to remove the rind from each segment of fruit (kind of like filleting a fish). (Count: You'll now have 8 pieces of pineapple.)


4. Place the fruit onto some paper towel and pat dry.

5. Take some skewers and impale each segment down the middle, leaving enough of the skewer exposed for easy handling. Place aside until needed.


6. Zest the lime into a bowl, then add in the sugar and cinnamon and mix until well combined.

7. Scatter a generous amount of the spiced sugar onto each pineapple skewer, then gently rub in until evenly coated.


8. Place the pineapple skewers onto a hot grill pan (or a barbecue if you prefer) and grill for approx. 2 minutes on each side. (You're just trying to get caramelised bar-marks on the fruit, rather than actually cook it.)

9. Once marked on each side, remove from the pan.


10. Serve warm with wedges of lime for squeezing over. (TIP: Use the lime you zested earlier, obviously.)

Serves 8

A video of this recipe is available at https://youtu.be/719RLI21BpQ.