28 February 2016

4.05 Strawberry & Black Pepper Crème Brûlée - Advanced - Baking & Desserts


Okay, so some of you may be thinking "wow, that's a weird flavour combination!". Well, the story behind this recipe actually goes back a couple of years...

I should probably start by introducing CakesByChoppa, who made the initial request that inspired this recipe. If you aren't familiar with him, Choppa is a quite successful Australian YouTuber who decorates cakes. Most of his work is heavily influenced by pop culture, but he also does the occasional video showing the more classical cake decorating techniques. I strongly recommend that you take a look at his YouTube channel, because there's seriously something for everyone.

Anyway, back to the story. Choppa's management company took him out to dinner a couple of years ago to one of those 'fancy' restaurants (you know the ones I mean, where style trumps substance and you end up with something visually awesome on your plate that never quite satisfies your hunger). At this dinner, he was served a very interesting-looking dessert that was basically a study in strawberries and pepper. There was strawberry jelly, strawberry sorbet, strawberry caviar, fresh strawberries, a vanilla mousse, peppercorn tuille, and a sprig of watercress "artfully" strewn over the top. Never one to be an adventurous eater, Choppa was pleasantly surprised, and has been raving about it ever since.

How do I know this, you may ask? Well, Choppa has been my flatmate for over a decade. Seeing as I do 90% of the cooking at home, Choppa has been trying to con me into recreating this dessert, however I tend to steer away from things that I think are over-complicated or pretentious. When I announced that this season I would be taking requests, unsurprisingly I ended up with a comment from Choppa asking for "a strawberry and black pepper dessert" and finally caved.

Seeing as there is no way I could be bothered replicating the dessert he had, I instead borrowed the main elements and condensed them into a simpler form. And thus, the Strawberry & Black Pepper Crème Brûlée was created!

PART A - SIMPLE STRAWBERRY COMPOTE


There is nothing complicated here, the name says it all. A compote is basically an un-set jam, which, I suppose, means it’s just a type of syrup. In that case, feel free to use this on some pancakes or crepes!

Ingredients:
350g strawberries, roughly diced
¼ cup caster sugar
2 tbsp lemon juice

Not much to it, right? This is probably the easiest part… besides eating it! Although the hard part there is stopping at just one…

Method:

1. Place all ingredients into a saucepan over medium-high heat.

2. Cook for 10-15 minutes, stirring occasionally, until you have a thin syrup and most of the strawberry has broken down.


3. Remove from the heat, transfer to a bowl, and allow to cool.

4. Distribute evenly amongst six 200ml ramekins, then place the ramekins into the freezer for the compote to set.


PART B - BAKED CUSTARD BASE


This is the most complicated part of the recipe, but other than knowing the exact time to remove from the oven, it’s not too difficult.

Ingredients:
300ml pure/single cream
300ml milk
5 egg yolks (at room temperature)
½ cup caster sugar
1 tsp vanilla extract/paste/essence

Once again, not too many ingredients, it’s just a matter of using them in the right way.

Method:

1. Preheat oven to 160°C (320°F).

2. In a 
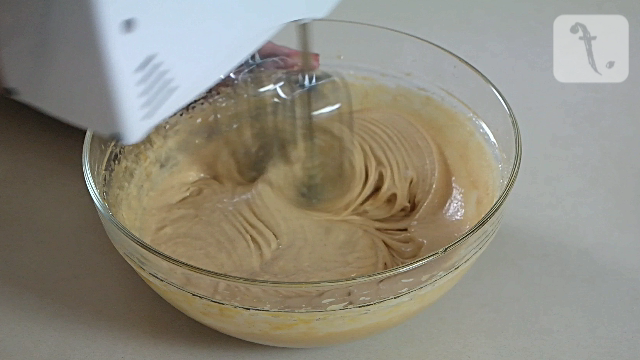
jug, whisk together the egg yolks and sugar until combined and smooth.

3. Place the cream, milk and vanilla into a saucepan over medium heat and bring to a slight simmer, then remove from the heat and slowly whisk into the egg and sugar mixture a bit at a time. (If you add it all at once or too quickly the eggs could cook, leaving you with a lumpy, sweet scramble.)


4. Allow the custard mix to cool for 10-15 minutes.

5. Remove the ramekins from the freezer and place them into a large, deep baking dish.


6. Divide the custard mixture evenly amongst the ramekins, leaving a gap of approx. half a centimetre at the top of each one. (This prevents overflow.)

7. Fill the baking dish with enough warm water to come up the sides of the ramekins. (TIP: Don’t use boiling water as your ramekins are still quite cold and may shatter.)


8. Place the baking dish into the oven and bake for 45-55 minutes, or until there is a slight wobble in the middle of each ramekin. (Keep an eye on this. Most crème brûlée recipes only cook for 25-35 minutes, but because your ramekins were cold and the custard and waterbath were warm instead of piping hot, you need a longer cooking time. I would recommend checking once at 30 minutes, then again at 45 minutes, to see if the custard has set.)

9. Remove the ramekins from the baking dish and allow to cool, then place into the fridge to chill for several hours. (TIP: Chill them overnight for best results.)


PART C - BLACK PEPPER BRÛLÉE TOPPING


And on to the final round! This part is not really complicated either, but if you’re new to blowtorch work in the kitchen, you may have some trouble knowing when the right level of caramelisation is reached.

Ingredients:
Caster sugar
Black pepper (coarse ground)
Mint leaves (optional)

I’ve left quantities out of this, as it’s basically just a matter of personal preference. When I made these, I used a couple of small pinches of pepper (¼-½ tsp) and 2-3 tsp of caster sugar for each crème brûlée and I think it was a good balance (Choppa agreed).

The mint is there to reference the watercress on the dessert that this is based on. Watercress has a peppery flavour. So does mint, but it also soothes the tastebuds after the pepper, and really brings out the acidity in the strawberries.

I’ll leave these choices up to you!

Method:

1. Remove the chilled ramekins from the fridge.

2. Scatter some of the pepper over the top of the custard. (See above for suggested amounts.)


3. Scatter some caster sugar over the pepper. (See above for suggested amounts.)

4. Using a kitchen blowtorch, melt the sugar, taking care not to remain in any particular spot for more than a second at a time to prevent burning.


5. Once the sugar is mostly melted and has begun to colour, spoon over some more caster sugar, then finish off with the blowtorch until all of the sugar is melted and a layer of caramelised toffee has formed. (Adding the extra sugar allows for a more even coating of toffee.)

6. Take a small sprig of mint leaves (if you choose to use them) and press it into the soft toffee. (If you don’t want whole mint leaves, then chop them finely and scatter over the top of the toffee instead).

7. Allow to cool for 2-5 minutes until the toffee has set, then eat! (Alternatively, you can place the crème brûlées into the freezer for 10 minutes so that the custard remains chilled.)


Serves 6 (in theory).

A video of this recipe is also available at - https://youtu.be/_-tJCuILC84.

If you have a recipe to request, it's not too late! Please send me an email and I'll see what I can do.

20 February 2016

4.04 Tips #7: Top 10 Kitchen Tricks & Hacks


I hope you’re enjoying the recipes so far, but this week I'm doing another Tips video (even though nobody asked me to).

Most people who enjoy cooking have their own little tips and practices that they use around the kitchen, and I'm no different. I'll show you the 10 little tricks that I use the most, some of them picked up from others and some of them that I just started using on my own. Plus, there’s a BONUS recipe for some simple Peking Duck Pancakes!

If you feel that you can sit this one out, I will be back with another recipe next week. For everyone else, please watch the video at https://youtu.be/s7fCpuwFiqQ.

If anyone would like to share their own tips, or even if you just have a question, please do not hesitate to email me.

I'm also still taking recipe requests for the rest of the season, so let me know if there's something you'd like to see!

12 February 2016

4.03 Avocado & Chargrilled Corn Salsa – Low-Fuss – Party Food


This week’s request comes from my friend, Damielou, who – surprise, surprise! – is yet another vlogger. She also happens to be a very talented singer, songwriter and musician. If that sounds like something you’d be interested in, I recommend checking out Damielou’s YouTube channel.

But getting back to the topic of food; Damielou’s request was almost as vague as last weeks’ was, being “something with Avocado in it”. However, this time I had some inside knowledge: Damielou has recently turned vegetarian.

With this now ruling out a rather large portion of potential edibles, I thought up something that everybody can enjoy, because it’s also 100% vegan! (but don’t let that put you off)

Ingredients:
1 large avocado (ripe, but firm)
1 corn on the cob (husk removed)
½ Spanish onion, diced finely
1 tbsp extra virgin olive oil
½ tsp chilli powder
Juice of 1 lime
Salt
White corn tortillas (optional)

When I say that the avocado should be “ripe, but firm”, that’s exactly what I mean. If this seems to be a contradiction (or you don’t know how to determine the ripeness of an avocado), allow me to elaborate. Step 1: Place the avocado in the palm of your hand. Step 2: Wrap your fingers around the avocado and gently press with the length of your fingers against your palm. If you feel no resistance and the avocado is soft, then it may be overripe. This means that it could potentially be brown if you cut it open, but either way it’ll just turn to mush when you try to stir the salsa together. If it’s solid as a rock, this means it’s not ripe for eating yet. You’ll probably have issues cutting this up, and it’ll be crunchy and unpleasant. If you feel it give way with a hint of resistance, this is EXACTLY the avocado you’ll want for this recipe! Firm enough to peel and dice, but soft and creamy enough to eat.

Spanish onion is my preference here. If you can’t get this, I’ll suggest either a half Tuscan red onion or a shallot. If neither of these options are available, then a white onion can suffice. Or even some baby radishes could work if you’d prefer.

You can swap the chilli powder for cayenne pepper, however they are essentially the same product (both are made by grinding dried chillis). If you’re looking for a milder alternative, use sweet or smokey paprika (which is also a ground dried chilli, but not as hot).

The tortillas are optional because it’s a matter of preference when serving. I’ll cover this more at the end of the recipe.

Method:

1. Place the diced onion into a large bowl along with the lime juice and a generous pinch of salt. Mix together until the onion is coated with the lime juice, then place aside until needed. (TIP: The longer you leave it, the better. The lime juice will soften the onion and mellow the flavour, while the salt will draw out the onion juices. This is called ‘steeping’ or ‘macerating’ and can be done up to 24 hours beforehand if you’re busy.)


2. In a bowl, mix together the chilli powder, olive oil, and a pinch of salt. Use a pastry brush to brush the spiced oil over the corn until well coated.


3. Fry the corn whole in a dry pan over medium-high heat, rotating every 2 minutes to ensure it is cooked on all sides (takes approx. 10-12 minutes) before removing it from the pan and allowing to cool completely. (The corn may burn here and there, but that’s the “chargrilled” element of the salsa. You could do this on a barbecue also.)

4. Use a sharp knife to remove the corn kernels from the cob. (Stand the corn up, and hold the top while slicing downwards against the cob.)


5. Stir the corn into the onion and lime juice mixture and place aside until needed again.

6. Peel the avocado and dice into smallish chunks, then mix with the corn and onion.


7. Transfer to a serving dish and top with some more olive oil, salt, and chilli powder.

8. Serve with some storebought tortilla chips, OR…

9. Heat some oil in a pan over medium-high heat and fry the optional white corn tortillas for 1-2 minutes on each side or until browned, then drain on some paper towels and serve with the salsa. (The type of oil isn’t really important, and you can either shallow fry or deep fry.)


Serves 1-6.

A video of this recipe is also available at - https://youtu.be/kXSFvxzOrFU.

If you have a recipe to request, it's not too late! Please send me an email and I'll see what I can do.

5 February 2016

4.02 PB&J Bakewell Slice - Low-Fuss - Baking & Desserts


This week's recipe is the result of a rather vague request made by one of my other vlogger acquaintances named Kev (a.k.a. JustKevYTP).

When I asked for people's input as to the recipes this season, not everyone was quite so specific (as you will likely see in coming entries) and Kev’s was simply "something with peanut butter in it". I did attempt to seek some clarification on this as these recipes are supposed to be "custom made" (i.e. sweet? savoury? food allergies? or other dietary issues?) but in the end made up my mind based on a snippet from one of his videos, and thus the idea was formed!

If you've never heard of it before, a Bakewell Tart (the inspiration for this recipe) is a traditional English confection consisting of a shortcrust pastry shell beneath layers of jam, frangipane and a topping of flaked almonds (thanks Wikipedia!). PB&J is the slang term for 'Peanut Butter & Jelly', a popular sandwich filling in USA and other parts of the world. Compare these two seemingly different foods side by side and you can't help but notice how similar they actually are, so why not combine them? *cue lightbulb*

With the number of people in the world - particularly those of us who like food (there's a few billion, I hear) - chances are that this idea has been attempted or done before by someone else. I typically don't research a lot of my spontaneous cooking ideas, so my apologies if this isn't new to you. But it's definitely new to me!

For those of you who are interested, please check out Kev's YouTube channel for an eclectic mix of vlogs, skits, and food challenges. Otherwise, we shall proceed to the cookery.

Ingredients:
1x 325g jar of peanut butter
⅓ cup fruit jam
1 cup plain flour
1 ½ cups caster sugar
¼ cup flaked almonds
2 eggs
1 tsp vanilla extract/paste/essence
Salt (optional)

Yes, I use a whole jar of peanut butter in this recipe. Kev wanted peanut butter? Well he GOT peanut butter! Although to be fair, it’s not a very big jar, and it replaces both the regular butter and almond meal used in a traditional Bakewell Tart. Plus, I use 100% natural peanut butter, which according to the ingredients on the jar contains only peanuts – not a single additive in sight! But you can use your favourite brand if you absolutely have to. I’d suggest smooth over crunchy, but it’s not really important.

And I know, I know, it should be JELLY instead of jam. Well, to that I say again: it’s not really important. I'm using jam not only because jelly isn't easily available in Australia, but also because it's easier to spread out over the crumbly base. But use jelly, or conserve, or fruit spread, or whatever you feel is best for you. Flavour also isn’t important; I used plum jam, but you might not like plums, so use strawberry, raspberry, apricot, blackberry, grape, cherry, or even marmalade!

Salt is optional because if you choose to use 100% natural peanut butter, it has no salt added. A little pinch takes some of the sweet edge off. You should consider this if you’re using a ‘salt reduced’ peanut butter too.

Method:

1. Preheat oven to 180°C (350°F) and line a brownie tin with baking paper (including the sides).

2. Place the flour, half of the sugar, and 175-200g of the peanut butter (approx. ⅔ of the jar) into a bowl and mix until it resembles damp sand. (It will look a bit dry at this point, but if you press some of it between your thumb and forefinger you’ll see that it clumps. TIP: If your peanut butter is really thick, I suggest resting the jar in some hot water for 5-10 minutes with the lid on until it becomes a bit runny. Because 100% natural peanut butter doesn’t contain any of the stabilisers that you’d find in regular peanut butter, it is runny enough on its own – another reason to consider it!)


3. Place the base mixture into the lined brownie tin and press it out firmly until you have an even layer across the bottom of the tin. (Make sure you get into the corners too!)


4. Spread the jam (or whatever you use) over the base until evenly coated. (Be a bit gentle, the base is a bit crumbly until you bake it.)


5. In a bowl, use an electric mixer to beat together the remaining peanut butter, sugar, eggs, vanilla, and a pinch of salt until light and fluffy.


6. Gently fold in the flaked almonds, then pour this mixture over the jam and base, ensuring that it spreads into the corners.


7. Bake for 20-25 minutes or until the top is set and begins to brown.

8. Allow to cool in the tin before slicing it into small squares.


9. Dust with icing sugar (optional) and serve!

Makes however many you cut it into. I usually get 36 out of a standard 20cmx20cm tin.

A video of this recipe is also available at - https://youtu.be/Pg8FntlEhQ4.

If you have a recipe to request, it's not too late! Please send me an email and I'll see what I can do.